How to Use a Custom Pottery Stamp: The Complete Guide to Branding Your Clay Work
Pottery stamps are one of the oldest tools in a maker's kit — the earliest known example is over 8,000 years old, and it was found in Turkey. But the question most potters ask today isn't historical. It's this: how do I actually use my custom pottery stamp without ruining a piece I've spent hours on?
Whether you've just received your first custom pottery stamp or you've been stamping for years and want to sharpen your technique, this guide covers everything — the right clay stage, the correct pressure, how to handle curved surfaces, the most common mistakes, and how to design a stamp that reads clearly every single time. There's also a section on why a maker's mark matters far more than most potters realize, especially if you sell your work.
Here's what you'll learn:
- Why a maker's mark is one of the best investments a selling potter can make
- What makes a custom pottery stamp different from a regular stamp
- How to identify the ideal clay stage for stamping
- Step-by-step technique for flat and curved surfaces
- How to fix the most common stamping problems
- Design rules that actually work on clay
Why Your Pottery Needs a Maker's Mark (More Than You Think)
Every piece of pottery you make is already "signed" in some sense — your touch, your throwing rhythm, the small irregularities that prove it's handmade. The question is whether anyone can actually identify it as yours once it leaves your studio.
A maker's mark — a custom stamp pressed into the base or wall of a clay piece — solves that problem permanently. It fires into the piece along with the clay itself, surviving every glaze firing, every dishwasher cycle, every decade on a shelf. Unlike a sticker, a hang tag, or a printed card, it cannot be lost or removed.
For potters selling through Etsy, craft markets, galleries, or their own websites, a consistent maker's mark does several things at once. It builds brand recognition across your product line — a buyer who picks up one of your mugs at a market can flip it over, photograph the mark, and find you again later. It adds perceived value: collectors and serious buyers look for marks as a sign of a professional practice. And it creates a record — every piece you've ever made, for as long as it exists, carries your name.
There are currently over 5,000 "ceramics maker's mark" listings on Etsy, which tells you two things. First, demand for personalized, signed handmade ceramics is very real. Second, most potters who sell professionally already understand this — a maker's mark is increasingly an expectation, not a luxury. If your pieces are anonymous, they're harder to remember, harder to attribute, and harder to price at the level your craft deserves.
Beyond the business case, there's something deeply satisfying about pressing your mark into fresh clay. Potters have been doing exactly this for millennia. When you stamp your work, you're joining a tradition that stretches back to ancient workshops where artisans signed bowls in exactly the same way — with a unique impression that said: I made this.
What Makes a Custom Pottery Stamp Different from Other Stamps
Before diving into technique, it helps to understand what you're actually working with — because a custom pottery stamp is a very different tool from the rubber stamps used for paper or fabric.
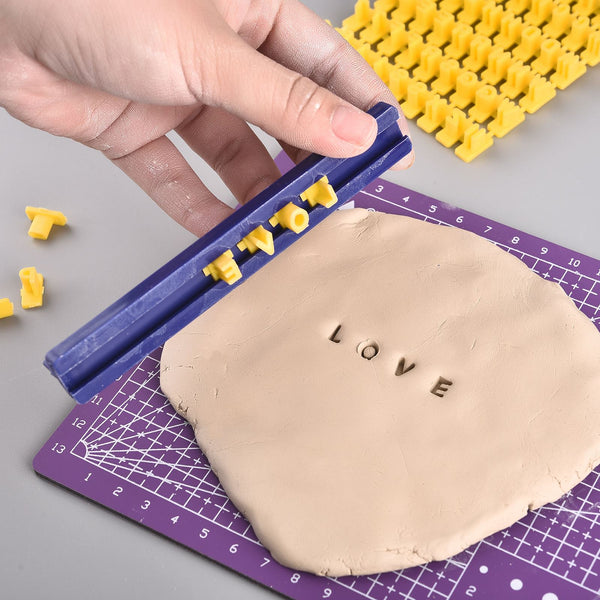
It is not an ink stamp. A pottery stamp creates a physical impression by displacing clay. There is no ink involved. The design is pressed directly into the clay surface, where it becomes a permanent relief detail once fired. This means a pottery stamp only works on impressionable materials: raw clay (at the right stage), polymer clay, soap, and dough.
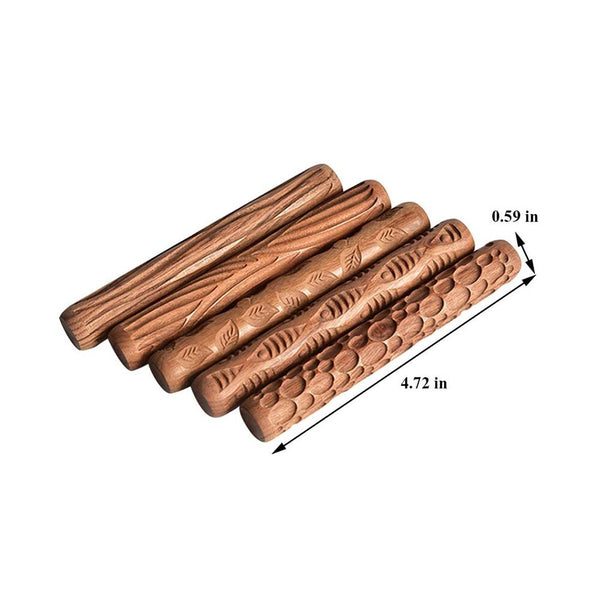
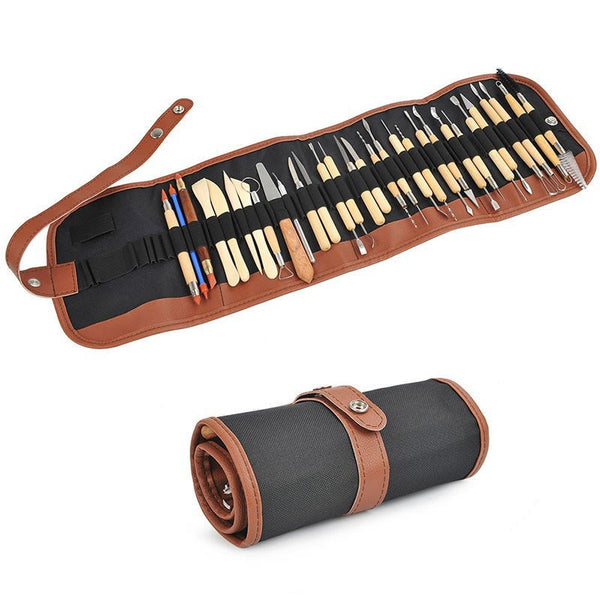
Stampty's custom pottery stamps are made from laser-cut recycled acrylic with a reclaimed wood handle. This is different from the brass or metal stamps many suppliers offer, and the difference matters in practice. Laser-cut acrylic delivers exceptional precision — fine lines and small text come through cleanly because the cutting process is digitally controlled. The acrylic surface also releases from clay more easily than porous materials, which reduces sticking when used with a light application of cornstarch. The reclaimed wood handle positions your hand directly over the stamp face, which makes applying even, centered pressure significantly easier than working with a bare acrylic disc.
The other key difference from paper stamps is depth. A pottery stamp needs to sink into the clay — typically 1 to 3 mm — to create a mark that will be visible after glazing. Glazes tend to pool in recessed areas, which can actually enhance the stamp impression visually, but only if the initial depth is sufficient. A shallow stamp impression can be obscured entirely by a thick glaze application. This is why pottery stamps are built with more structural rigidity than rubber ink stamps — they need to transmit consistent pressure across the full design face without flexing.
The Golden Rule: Getting Your Clay to the Right Stage
This is the single most important variable in pottery stamping, and it's the one that trips up beginners most often. The clay stage — how much moisture remains in the clay at the moment you press the stamp — determines whether you get a crisp, clean impression or a sticky, smeared mess.
The ideal stage is leather-hard. At this point, the clay retains roughly 15% of its original moisture content. It is firm enough to hold detail without collapsing under pressure, but moist enough that the stamp can displace the clay surface rather than cracking it. The surface of leather-hard clay feels cool to the touch — not sticky, not slick, and definitely not dry. If you press your fingertip firmly against the surface, it should leave a faint impression without the clay sticking to your finger.
Here's what happens at the wrong stages:
- Too wet: The stamp sinks too deeply and unevenly. Clay sticks to the stamp face, tearing the surface when you lift it. The impression is deep but messy, with ragged edges. This is the most common cause of ruined stamps.
- Too dry (bone dry or near bone dry): The clay is too rigid to accept the impression. You'll either get a very shallow mark with crisp edges, or — more likely — hairline cracks will appear around the design as the brittle clay fractures under pressure.
In practical terms, the leather-hard stage usually occurs several hours after throwing or building, depending on the thickness of the piece, the humidity in your studio, and how you're drying the work. Many potters stamp after trimming, since trimming typically happens when the clay has firmed up to the right consistency. If you prefer to trim at a softer stage, let the piece continue drying after trimming before you stamp — the outside surface needs to reach leather-hard while the inside stays slightly softer, which actually helps with curved-surface stamping.
When in doubt, test on a scrap piece of the same clay at the same apparent dryness before committing to your best work.
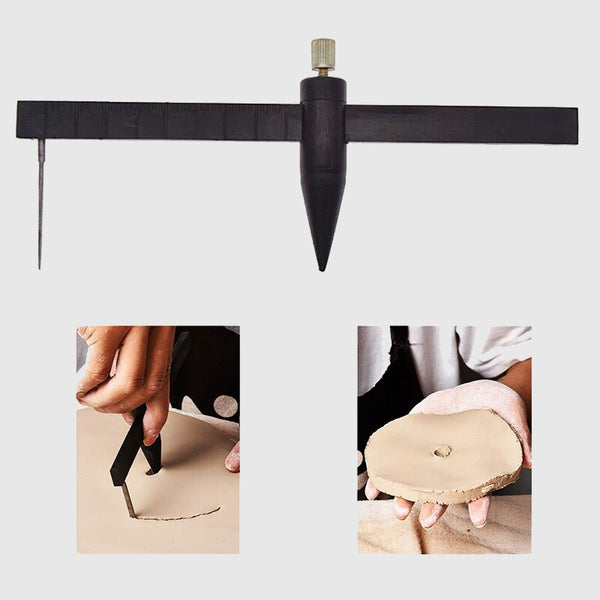
Step-by-Step: How to Use a Custom Pottery Stamp
With your clay at the right stage, here's the complete process for getting a clean, professional impression every time.
Step 1: Apply a Release Agent
Even at the correct clay stage, some sticking can occur — especially with fine details or designs with enclosed negative spaces. A light release agent prevents molecular bonding between the stamp surface and the clay.
For acrylic stamps like Stampty's, cornstarch is the best choice. Use a soft, fluffy brush to apply a thin, even layer directly onto the clay surface — not onto the stamp face. The layer should be invisible; if you can see white powder, you've applied too much. Cornstarch burns off completely during firing and does not affect glazing.
For brass or metal stamps, vegetable oil or WD-40 applied lightly to the stamp face works well. Reapply every few impressions, as the coating depletes with use.
Step 2: Position the Stamp Deliberately
Before pressing, decide exactly where you want the impression and align the stamp face with that area. For a maker's mark on the base of a piece, center it visually. For a logo on the side of a mug, align it with the horizontal plane of the wall. Once you press, repositioning is not possible — a second impression on the same spot will create a double image.
If you're using a stamp with a reclaimed wood handle (like Stampty's), grip the handle so that your hand is directly above the stamp face. This allows you to apply force straight downward, rather than at an angle.
Step 3: Apply Even, Firm Pressure
For flat surfaces — the base of a bowl, a coaster, a slab tile — press straight down with even pressure across the entire stamp face. A slight rocking motion from edge to edge can help seat the stamp fully into the clay without requiring excessive downward force. The goal is to sink the full design to a consistent depth of 1 to 2 mm.
For curved surfaces — the wall of a mug, the side of a vase — support the inside of the clay wall with your fingers or your palm while pressing from the outside. This prevents the wall from collapsing or distorting. Use a stamp no larger than 1 to 1.5 inches for curved surfaces; larger stamps cannot conform to the curve and will leave partial impressions. Apply pressure gradually, starting at the center of the stamp and rolling gently outward to each edge.
Step 4: Lift Perpendicularly
This is the step most people get wrong, and it is the single most common cause of smeared impressions. When lifting the stamp, pull it straight up and away from the clay surface — directly perpendicular to the clay. Do not slide, drag, or twist the stamp as you lift it. Any lateral movement will pull clay with it, smearing the edges of the impression and potentially tearing the surface.
If you feel resistance when lifting, do not pull harder. Instead, press down very gently to re-seat the stamp, apply a little more cornstarch around the edges with a brush, and then lift again — slowly, perpendicularly.
Step 5: The Medallion Method for Large or Complex Designs
If your logo design is large (over 2 inches) or your piece has a complex curved surface that makes direct stamping difficult, the medallion method is an elegant solution. Cut a small, flat disc of clay from a fresh slab. Press your stamp firmly into the flat disc — you'll get a clean, deep impression because the clay is fully supported. Attach the stamped medallion to your piece using slip, blending the edges carefully. Once fired, the medallion becomes a permanent part of the piece.
Step 6: Clean and Store Your Stamp
After each session, rinse the stamp face under cool running water and use a soft brush or toothpick to remove any clay lodged in the engraved details. Never use abrasive pads or soak the stamp in water. Allow the stamp to air dry completely before storing it — storing a damp stamp can cause moisture damage over time. Keep it in a clean, dry place away from direct sunlight.
Common Mistakes and How to Fix Them
Even experienced potters run into stamping problems. Here's what's actually happening and how to correct it.
The Stamp Sticks and Tears the Clay
This is almost always a clay stage issue — the clay is too wet. Let the piece dry for another 30 to 60 minutes and test again on a scrap piece. If the clay is already at leather-hard and sticking is still occurring, increase the cornstarch application on the clay surface and ensure you're lifting perpendicularly.
The Impression is Blurry or Incomplete
Blurriness usually means the stamp moved during pressing or lifting. Use a handle that lets you apply centered, stable pressure. An incomplete impression — where part of the design registers but other areas don't — means uneven pressure. The stamp face is likely tilting slightly as you press. Focus on applying force through the center of the stamp.
The Clay Cracks Around the Design
Cracking means the clay is too dry. Unfortunately, this cannot be reversed on the same piece. Going forward, stamp earlier in the drying process. If you're using a large stamp, supporting the reverse side of the clay wall can reduce cracking by preventing the overall piece from flexing under the stamping pressure.
The Impression is Too Shallow
Increase pressure and make sure the clay is moist enough. If the clay is at the right stage and pressure is adequate, the design itself may have very fine lines or small elements that aren't capturing well — see the design section below for guidance on minimum dimensions.
Design Tips: What Works on Clay and What Doesn't
Your stamp is only as good as the design it carries. Clay is an unforgiving medium for certain types of artwork, and understanding its limits before you order will save you from disappointment.
Minimum Line Thickness: 0.3 mm
Lines thinner than 0.3 mm are extremely difficult to reproduce reliably in clay. They may appear as blurred marks, or they may fill with clay during pressing and disappear entirely. Before submitting your design for production, check that all lines — including the strokes of any lettering — are at least 0.3 mm thick. Most professional vector design applications show stroke weights in millimeters.
Simplicity Wins
The designs that read best on clay are not the most detailed ones — they're the most deliberate ones. A bold monogram, a strong geometric symbol, or your studio name in a clean typeface will always outperform an intricate illustration at pottery stamp scales. Think about how the mark will look filled with glaze pooling in the recessed areas — that pooling effect can enhance a simple design dramatically and obscure a complex one.
Size Guide
Maker's marks — the small signature stamps typically placed on the base of a piece — work best between ½ inch and 1½ inches wide. At this size, a clear, simple design is easily legible without dominating the piece. Logo stamps intended for the visible side of a mug, plate, or tile can run from 1½ to 3 inches; larger stamps require more pressure and generally work better on flat, well-supported surfaces. Stampty can produce stamps larger than 8 × 8 cm on request.
Text Considerations
If your design includes text, use a minimum font size equivalent to 9-point type. Below this, individual letter forms tend to lose definition in clay. Serif fonts with very thin hairline strokes (like Didot or Bodoni at small sizes) are risky choices — the thin strokes may not reproduce. Bolder serif fonts and most sans-serif faces work reliably. When in doubt, Stampty's team will review your design and flag any elements that may not produce well before production begins.
How to Order Your Custom Pottery Stamp from Stampty
Ordering is straightforward, and you don't need a finished logo to get started.
Stampty accepts vector-based files (.ai, .eps, .svg, or .pdf) as the ideal submission format. High-resolution images (.jpg, .png at 300 dpi or above) are also accepted. If you have a hand-drawn sketch, a photo of your signature, or even a description of what you're looking for, you can email it to hello@stampty.co — the team will work with you to develop a production-ready design.
The process works in three steps. First, upload your design and select your stamp size when placing your order. Second, Stampty will send you a digital proof for approval — production does not begin until you confirm the design looks right. Third, production is completed within 1 to 2 business days after approval, with worldwide shipping included.
The stamp itself is laser-cut from recycled clear acrylic with a reclaimed wood handle, and it arrives ready to use directly on leather-hard clay, polymer clay, soap, and dough.
Order your custom pottery stamp from Stampty →
Conclusion
Using a custom pottery stamp well comes down to four things: clay at the leather-hard stage, a light release agent, even perpendicular pressure, and a design built for the medium. Get those four right, and every piece you stamp becomes instantly recognizable as yours — fired permanently into the clay, impossible to remove, impossible to mistake.
For potters who sell their work, a maker's mark is one of the most cost-effective branding investments available. One stamp, ordered once, signs every mug, bowl, plate, and tile you'll ever make. Collectors look for marks. Repeat buyers use them to find you again. And every piece that leaves your studio carries your name — quietly but permanently — into someone's home.
Stampty's custom pottery stamps are laser-cut from recycled materials, produced within 1 to 2 business days after design approval, and shipped worldwide. If your clay work deserves to be recognized, give it a mark worth remembering.
Get your custom pottery stamp at Stampty.co →
Frequently Asked Questions
Can I use a custom pottery stamp on wet clay?
Using a stamp on wet clay usually results in a smeared impression and the stamp sticking to the surface. The ideal stage is leather-hard clay — firm enough to hold detail without collapsing, but moist enough to accept a clean impression. The surface should feel cool to the touch but not sticky or shiny.
What release agent should I use with an acrylic pottery stamp?
Cornstarch is the best release agent for acrylic and laser-cut stamps like Stampty's custom pottery stamps. Apply a light dusting to the clay surface (not the stamp face) with a soft brush before pressing. Cornstarch is invisible after firing and does not interfere with glazing.
How do I stamp on a curved surface like a mug?
For curved surfaces, support the inside of the wall with your fingers while pressing the stamp. Use a stamp no larger than 1 to 1.5 inches and apply pressure with a slight rolling motion — from one edge to the other — rather than pushing straight down. Always lift the stamp perpendicularly away from the clay.
What file format do I need to order a custom pottery stamp from Stampty?
Stampty accepts vector-based files (.ai, .eps, .svg, or .pdf) as well as high-resolution images (.jpg, .png). If you only have a photo of a drawing or a business card, you can email it to hello@stampty.co and the team will advise on whether it can be adapted for production.
How do I clean and store my acrylic pottery stamp?
Rinse the stamp face under cool water immediately after use and remove any clay residue with a soft brush or toothpick. Avoid soaking or putting the stamp in a dishwasher. Allow it to dry completely before storing in a clean, dry place. Do not use abrasive pads or harsh chemicals.