How to Stamp on Any Surface: The Complete Ink & Technique Guide for Large Custom Stamps
You ordered your large custom stamp, your logo looks perfect, and then you open your ink drawer and realize: you have no idea which ink to use. Use the wrong type on kraft paper and the impression smears before it dries. Use the wrong type on fabric and the design washes out after one laundry cycle. Use the wrong type on wood and the ink bleeds into the grain, losing every crisp detail you paid to have engraved.
The stamp is only half the equation. The other half is knowing how surface type, ink chemistry, and stamping technique interact — and that knowledge makes the difference between a professional impression and a wasted one.
This guide covers every common surface a large rubber stamp touches, the exact ink type that works best on each, and the technique adjustments that matter most when you're working with an oversized design.
Understanding Ink Types: The Foundation
Before surface-by-surface guidance makes sense, you need a clear picture of what ink types actually exist and why they behave differently. There are four categories that matter for large custom rubber stamps.
Dye-Based Ink
Dye ink is a thin, water-based liquid where color molecules dissolve fully into the carrier fluid. When it hits a porous surface, it absorbs quickly — which means fast dry times and vibrant color, but limited opacity on anything other than white or very light backgrounds. It is the standard ink inside most self-inking office stamps. For large rubber stamps on plain kraft or uncoated paper, dye ink is fast and reliable. Its weakness is moisture: it is not waterproof and will bleed if it gets wet.
Pigment-Based Ink
Pigment ink carries color as fine suspended particles rather than dissolved molecules. It sits on top of the surface instead of sinking in, which makes it more opaque, more fade-resistant, and slower to dry. On porous surfaces (kraft, fabric, unfinished wood, clay) it can be heat-set to become permanent and even wash-resistant. This versatility makes pigment ink the most useful all-rounder for small business owners who stamp across multiple materials.
Fabric (Textile) Ink
Fabric ink is a specialized formulation of pigment ink engineered to bond chemically with natural textile fibers — cotton, linen, canvas, and similar materials. Standard pigment ink will sit on fabric for a while but eventually cracks and fades. Fabric ink, once heat-set with an iron or heat press, becomes part of the fiber and survives repeated washing. If you stamp on anything you intend to launder, fabric ink is non-negotiable.
Solvent-Based Ink
Solvent ink uses a chemical solvent (rather than water) as its carrier. This allows it to penetrate and adhere to non-porous surfaces where water-based inks simply bead up and refuse to dry — plastic, glass, metal, coated cardboard, and laminated bags. Solvent ink dries fast, is permanent, and requires a solvent-based cleaner rather than water for stamp cleanup. The most widely available brand is StazOn. Use it on any smooth, glossy, or coated surface.
The Roller Technique: How to Ink a Large Stamp
Standard ink pads max out at roughly 10 × 15 cm. If your large custom stamp extends beyond that — or if you want absolutely even coverage across a wide design — a standard ink pad becomes a limiting factor. The roller method solves this completely.
Here is the process:
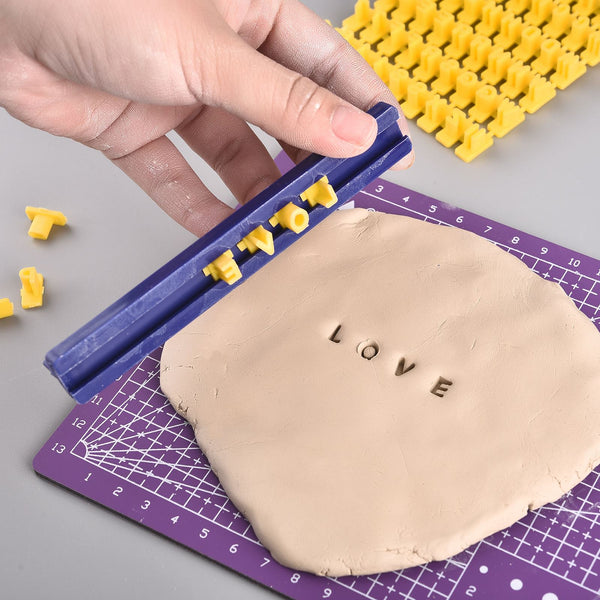
- Squeeze a small amount of ink onto a non-porous surface — a glass tile, a sheet of acrylic, or even a smooth plastic cutting board. A strip about the width of a finger is usually enough to start.
- Roll a foam brayer through the ink in multiple directions until the roller is coated in a thin, even layer. The ink should look smooth and matte on the roller, not thick or shiny. Too much ink blobs; too little produces a faint, incomplete print.
- Roll the inked brayer directly over the rubber face of the stamp, going in multiple directions to reach every corner and detail. For a stamp larger than 12 cm on its longest side, make two to three passes.
- Stamp immediately. Large rubber stamps benefit from placing the stamp face-down on a flat surface, then applying firm, even downward pressure from above — or placing the stamp face-up and pressing the material down onto it. The second method (material-down) often gives more even pressure distribution.
- Lift straight up, without rocking or sliding, to avoid smearing.
A test print on scrap material before committing to your actual packaging is always worth doing — it lets you calibrate ink coverage and pressure without wasting branded materials.
Kraft Paper & Cardboard Boxes
Kraft paper is the most common surface for large custom stamps, and the good news is it is also the most forgiving. Kraft is uncoated and porous, which means almost any water-based ink absorbs cleanly without beading or smearing.
Best ink type: Dye-based or pigment-based ink. For high-volume runs where you need fast dry times between stamps, dye ink is the practical choice. For a bolder impression that resists fading when your packages sit on a shelf or near a window, pigment ink delivers better results.
Ink color tip: The natural brown tone of kraft paper absorbs dark colors well. Black is the highest-contrast choice and the most versatile. White ink (use opaque pigment or specialty white ink) creates a striking contrast on dark kraft but requires slightly longer dry time. Avoid pale colors like light yellow or pastel pink — they disappear against the brown base.
Technique notes: Corrugated cardboard has a slightly uneven surface. Press firmly and hold for two to three seconds rather than a quick tap-and-lift. For mailing boxes where the impression will be handled, allow the ink to dry fully (two to three minutes for dye ink, up to five for pigment) before stacking boxes.
Uncoated & Tissue Paper
Tissue paper, wrapping paper, and lightweight uncoated paper are delicate surfaces that require lighter pressure and a drier stamp than cardboard does. Too much ink on tissue will bleed through the paper or cause it to wrinkle.
Best ink type: Dye-based ink works best here because of its thin consistency and fast absorption. Use slightly less ink than you would on cardboard — one roller pass rather than two.
Technique notes: Lay the tissue paper flat on a firm surface before stamping. If the paper shifts during stamping, a loop of low-tack tape on the underside holds it in place. Lift the stamp with minimal lateral movement; tissue paper wrinkles if the stamp drags. For patterned or colored tissue paper, test your ink color first — a mid-tone or dark ink shows clearly on most tissue colors.
Fabric, Tote Bags & Clothing
Stamping on fabric is where ink choice matters most, because the wrong ink type looks fine initially and then disappears in the wash. Tote bags, cloth bags, linen wrapping, cotton t-shirts, aprons, and fabric labels all fall into this category.
Best ink type: Fabric ink (textile ink) only. Standard dye ink and most pigment inks are not formulated for textile adhesion and will fade or crack after washing. VersaCraft (by Tsukineko) is widely available and works across cotton, linen, and canvas. Many multi-surface pigment inks can also be used on fabric if heat-set — check the manufacturer's guidance.
Heat-setting is mandatory. Once the impression is fully air-dried (allow at least 30 minutes), place a thin cloth over the stamped area and iron at medium heat — approximately 160°C (320°F) — for 15 seconds. This permanently bonds the ink to the fiber. Without heat-setting, even fabric-specific ink will wash out within a few cycles.
Fabric prep: Wash and dry the fabric before stamping to remove any factory finishes that could prevent adhesion. Iron it flat so the surface is even. Slide a piece of cardboard or a wooden board inside tote bags before stamping to prevent ink from bleeding through to the back panel.
Dark fabrics: Standard fabric ink is semi-transparent and will not show clearly on black, navy, or other dark fabrics. For dark textiles, use an opaque white fabric ink as a base layer, or choose a specialty opaque pigment fabric ink formulated for dark materials.
Raw Wood & Wooden Packaging
Unfinished wood — crates, wooden boxes, raw planks, and wood-wrapped packaging — is a beautiful surface for large custom stamps and requires specific technique to get clean results.
Best ink type: Pigment-based ink. The opacity of pigment ink means the impression shows clearly against wood grain without disappearing into the pattern. Dye ink absorbs too quickly and unevenly into the grain, which causes the edges of your design to look ragged or washed out.
Surface prep: Sand the stamping area lightly with fine-grit sandpaper before inking. This creates a more even surface and reduces grain interference. Wipe away any sawdust with a dry cloth.
Technique notes: Apply firm, even pressure and hold for three to five seconds — longer than you would on paper. Wood grain creates micro-variations in surface height, and holding the stamp in place allows ink to reach slightly recessed areas. Lift straight up. Allow the impression to dry for at least five minutes before handling.
Sealing: If the stamped wooden piece will be handled repeatedly or stored outdoors, protect the impression with a light coat of clear matte spray varnish. This keeps the design crisp and prevents smudging from hand oils.
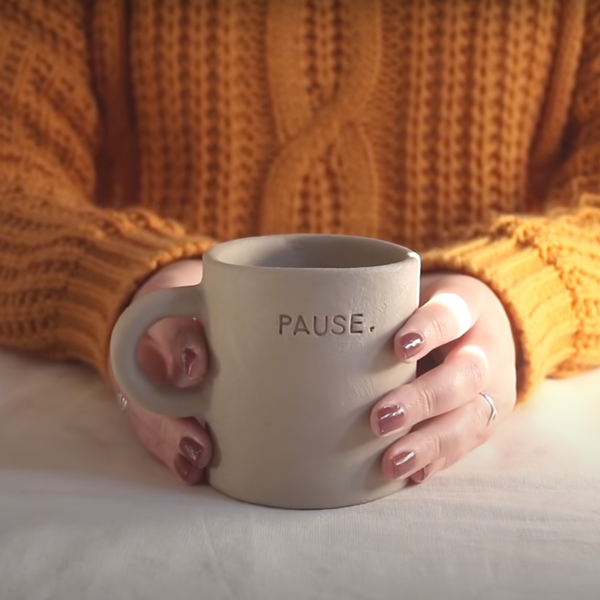
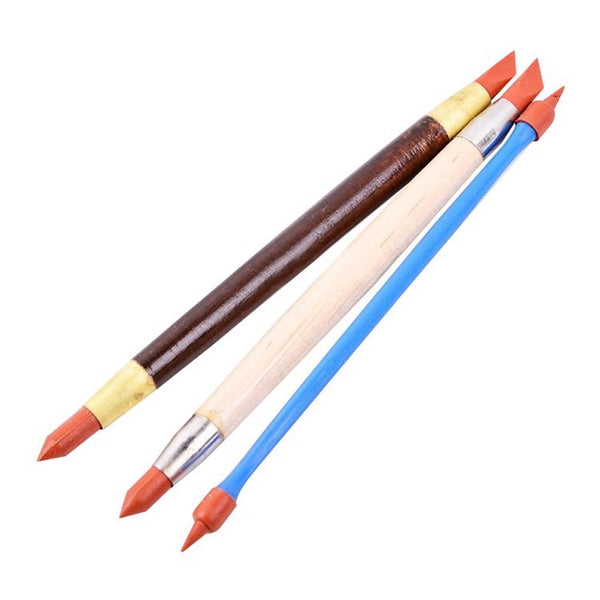
Ceramic & Clay
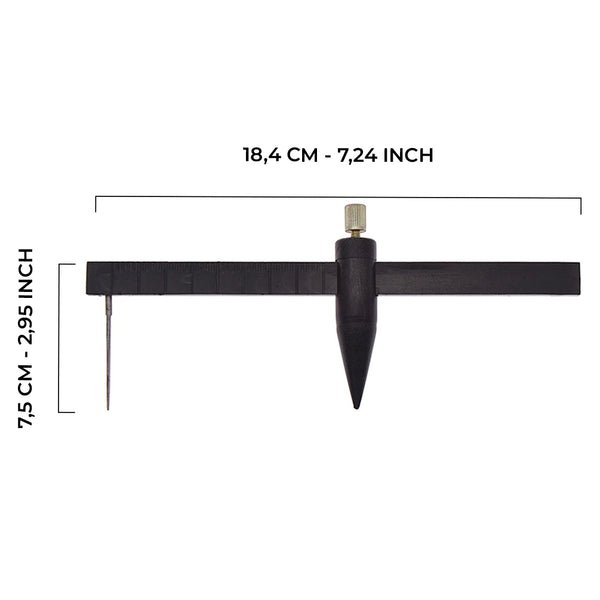
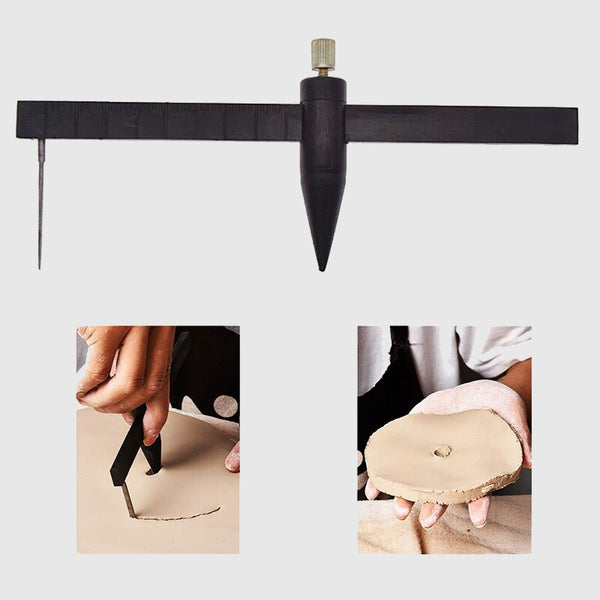
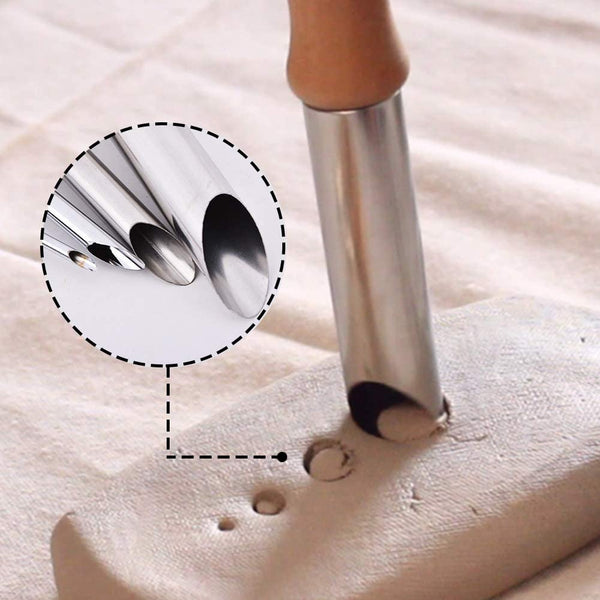
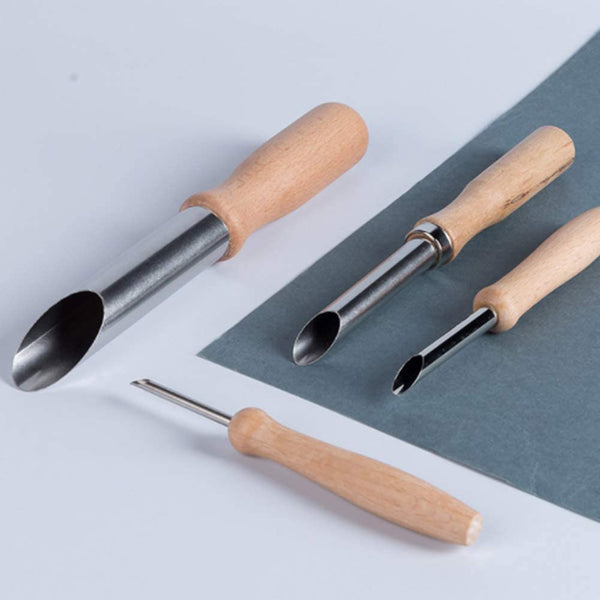
Ceramic and clay are unique because the stamping happens before firing — the large rubber stamp presses directly into unfired clay or greenware to leave a physical impression rather than an ink-based one. If you also work with pottery stamps, this is familiar territory.
For raw clay, no ink is needed at all. Press the custom pottery stamp (or the rubber face of a large custom stamp) firmly into clay at the leather-hard stage — when the clay is firm but still has some moisture. Apply even downward pressure for two to three seconds, then lift straight up without rocking. The impression becomes permanent once the piece is fired.
For finished, glazed ceramic where you want to add a stamped logo or pattern with ink (for example, stamping a design onto a glazed tile or decorative piece), use solvent-based ink. Standard water-based inks will not adhere to fired glaze. Clean the ceramic surface with isopropyl alcohol before stamping to remove any oils.
Coated, Glossy & Non-Porous Surfaces
Coated cardboard, glossy paper bags, laminated labels, plastic, glass, and metal are all non-porous surfaces — meaning water cannot penetrate them. Water-based inks (dye and most pigment inks) will bead on the surface, smear when touched, and never fully dry.
Best ink type: Solvent-based ink only. StazOn is the most commonly available brand and comes in a wide range of colors including black, navy, brown, and metallic shades. Solvent ink dries to a permanent, smear-proof finish on all non-porous materials.
Application tips: Apply solvent ink using the roller method — it ensures full coverage and prevents the thick solvent base from pooling in recessed areas of the stamp. Allow 60–90 seconds of dry time before touching the impression. Clean your stamp promptly after use with a solvent ink cleaner (not water) to prevent the ink from curing in the rubber detail.
Ventilation: Solvent inks contain chemical carriers that produce fumes. Work in a well-ventilated area or outdoors when stamping large quantities on glossy surfaces.
Quick-Reference Surface & Ink Table
| Surface | Best Ink Type | Heat-Set? | Key Tip |
|---|---|---|---|
| Kraft paper / uncoated cardboard | Dye or pigment | No | Black ink = highest contrast on brown |
| Uncoated / tissue paper | Dye (thin application) | No | Use less ink; tape paper flat before stamping |
| Cotton, linen, canvas fabric | Fabric (textile) ink | ✅ Yes — 160°C, 15s | Pre-wash fabric; use opaque ink on dark textiles |
| Tote bags & cloth packaging | Fabric ink | ✅ Yes | Insert cardboard inside bag to prevent bleed-through |
| Raw / unfinished wood | Pigment | Optional | Sand lightly first; seal with matte varnish after |
| Unfired clay / greenware | No ink needed | N/A | Press at leather-hard stage; impression fires permanently |
| Fired / glazed ceramic | Solvent | No | Clean surface with IPA before stamping |
| Coated / glossy cardboard | Solvent | No | Use roller method; allow 60–90s dry time |
| Plastic, glass, metal | Solvent | No | Work in ventilated space; clean stamp with solvent cleaner |
Universal Tips for Large Stamps
Beyond surface-specific advice, a few principles apply to every large custom stamp regardless of what you are stamping on.
Always do a test print first. No matter how experienced you are, the first impression on a new surface or with a new ink should land on a piece of scrap material. Test prints cost nothing and reveal calibration issues — too much ink, uneven pressure, misalignment — before they cost you branded packaging.
Even pressure is everything. Large stamps are more sensitive to uneven pressure than small ones because the contact area is bigger. If you press harder on one corner, that corner prints darker while the opposite corner prints light. Use both hands — one on each end of the stamp block — and press straight down with equal force. A rubber mat under your stamping surface adds slight cushioning that helps distribute pressure evenly.
More ink is not better. Over-inking a large stamp causes the fine details to fill in and the edges to bleed. A thin, even coat of ink produces sharper results than a thick one. If your first test print is too light, add a small amount more ink and test again. If the impression is smearing or bleeding, you have too much ink — wipe the stamp face with a clean cloth and start with a thinner application.
Clean your stamp after every session. Ink that dries in the crevices of a rubber stamp gradually fills in fine details, reducing sharpness over time. For water-based inks, a damp cloth or baby wipe cleans the rubber face immediately after use. For solvent inks, use a dedicated solvent cleaner. Store stamps face-up and away from direct sunlight to preserve the rubber.
Straight lines are harder than they look. For packaging where logo alignment matters, create a simple positioning guide. Lay a straight edge (a ruler or strip of masking tape) on your packaging surface to mark where the stamp's edge should land, then remove the guide before stamping. Two minutes of setup saves a box of crooked impressions.
Frequently Asked Questions
What ink should I use for stamping on kraft paper with a large custom stamp?
Dye-based ink or pigment-based ink both work well on uncoated kraft paper. Dye ink absorbs quickly and dries fast, making it ideal for high-volume packaging runs. Pigment ink sits on top of the surface, gives bolder color, and is more fade-resistant — a great choice if your packaged products sit in sunlight or on shelves. For kraft paper, black or dark ink delivers the highest contrast against the natural brown tone.
Can I use a large rubber stamp on fabric or clothing?
Yes. Use fabric-specific ink (also called textile ink), which is formulated to bond with natural fibers like cotton, linen, and canvas. After stamping, heat-set the design by ironing at 160°C (320°F) for 15 seconds — this makes the impression wash-resistant and permanent. Avoid solvent ink on fabric you intend to launder, as it tends to break down with repeated washing.
How do I ink a stamp that is larger than my ink pad?
The easiest technique is the roller method: squeeze a small amount of block printing ink or stamp ink onto a non-porous surface (a glass tile or acrylic sheet works perfectly), roll it with a foam brayer until evenly coated, then roll the brayer directly over the rubber face of the stamp. This ensures full coverage even for stamps that measure 10 × 15 cm or larger. Alternatively, some oversize ink pads (raised-surface designs) accommodate large stamps — flip the stamp face-up and press the pad onto it for even application.
What is the best ink for stamping on wood with a large custom stamp?
Pigment-based ink works well on raw or lightly sanded wood because the opaque pigment sits on the grain without bleeding. Apply the ink using the roller method for full coverage, press the stamp firmly and hold for 3–5 seconds, then lift straight up. Seal the impression with a clear matte wood varnish once fully dry to protect against wear. Avoid dye ink on wood — it absorbs too quickly into the grain and can look uneven.
Do I need a different ink for glossy or coated surfaces?
Yes. Standard water-based inks (dye or pigment) will bead up and smear on glossy, laminated, or coated surfaces because they cannot absorb into the material. For coated cardboard, glossy bags, plastic, glass, or metal, use solvent-based ink (StazOn is a widely available brand). Solvent ink dries fast, is permanent, and adheres to non-porous surfaces without smearing.
Ready to put this guide to use? Explore the Stampty large custom stamp — available in sizes up to 12 × 8 cm (and larger on request) — and bring your brand to every surface you ship, wrap, or create.