How to Design a Custom Stamp: From Idea to Ink in 5 Simple Steps
You have an idea for a custom stamp — a logo for your packaging, a book stamp for your library, a wax seal design for your wedding invitations. But somewhere between that idea and a clean, crisp impression, things go wrong: the text comes out blurry, the fine lines disappear, or the design looks perfect on screen but muddy on paper.
Here's why that happens, and how to avoid it. This guide walks you through designing a custom stamp that actually works on rubber — not just one that looks good in a design app. From concept to production-ready file, these five steps cover everything a first-time stamp designer needs to know.
Step 1: Define Your Purpose and Surface
Before you open any design tool, answer two questions that will shape every decision that follows: What is this stamp for? and What surface will it touch?
These aren't just aesthetic questions — they're technical ones. A stamp used to mark kraft packaging needs different ink and rubber density than a wax seal stamp pressed into hot wax. A book stamp designed for smooth book pages can carry more detail than a stamp used on uneven handmade paper or rough burlap.
Here's a quick surface guide:
| Surface | Design complexity | Ink type | Notes |
|---|---|---|---|
| Smooth paper / cardstock | Medium–high | Dye-based or pigment | Most forgiving surface; fine text works well |
| Kraft / recycled paper | Medium | Pigment or archival | Texture absorbs ink unevenly; simplify details |
| Fabric / canvas | Low–medium | Fabric ink | Weave diffuses edges; bold shapes only |
| Wood / leather | Low | Solvent or acrylic | Grain absorbs unevenly; go as simple as possible |
| Hot wax (wax seal) | Medium | N/A (metal stamp) | Wax captures relief well; avoid tiny text |
Once you know your surface, you know your complexity ceiling. Smooth cardstock? You can include a detailed logo. Unbleached kraft tape? Strip it back to a clean icon and one line of text.
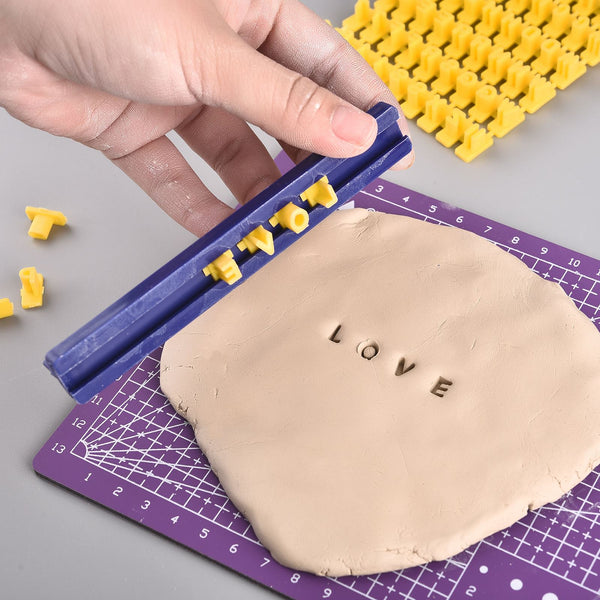
Also decide on stamp type before you start designing: a traditional rubber stamp with a wood handle, a self-inking stamp for high-volume use, a photopolymer stamp for crafters, or a brass-head wax seal stamp. Each type handles fine detail slightly differently, and your maker will need this information when reviewing your artwork.
Step 2: Sketch and Simplify Your Design
The single most important design principle for rubber stamps is one that most design guides bury in a footnote: stamps are binary. There is ink, and there is no ink. No gradients, no shading, no grey tones. What you see in full colour on your screen will be reduced to solid black on rubber — and everything that doesn't survive that reduction will disappear.
Start with pencil and paper. Rough sketches force you to think in strong shapes rather than colours and effects. Draw what your stamp would look like if you could only use a felt-tip marker: solid fills, clear outlines, no blending.
As you sketch, keep these rules in mind:
- Simplicity wins every time. A design that looks "too simple" on paper often looks exactly right when stamped. A design that looks detailed on screen often becomes an ink blob on rubber.
- Think in positive and negative space. The raised parts of the rubber (positive) pick up ink and print. The recessed parts (negative) stay blank. Your design needs enough contrast between these areas to be legible.
- Text needs room to breathe. Letters that are too close together, or that sit inside a tight border, will bleed into each other when ink spreads slightly on contact.
- Every element should be visible at stamp size — not just on screen. Zoom out your sketch to actual stamp dimensions and squint. If you can't read the text or identify the icon at a glance, simplify it further.
If you're adapting an existing logo, this is the step where you decide what survives. Drop the gradient fills. Eliminate thin decorative lines. Replace any text below 8pt with larger, bolder alternatives. What remains should look like a seal or monogram — clean, confident, and immediately recognisable.
Step 3: Go Digital — and Learn the Production Rules
Once your sketch feels right, move it into a digital design tool. This is where most first-time stamp designers make mistakes — not because they're bad designers, but because they don't know the production rules that separate a stamp-ready file from one that will cause problems.
Choose the right tool
Adobe Illustrator, CorelDRAW, or Inkscape (free) are the preferred choices because they work in vector format — the format stamp makers need. If you use Canva, Photoshop, or another raster-based tool, you can still create usable artwork, but you'll need to export at high resolution and may need to pay for a vector conversion service.
The five production rules that matter most
1. Work in black and white only. Your design should have no grey values, no colour fills, no gradients. Pure black (#000000) and pure white (#FFFFFF). The laser that engraves the rubber can only read areas as "engrave" or "don't engrave" — anything in between gets interpreted unpredictably.
2. Keep fonts at 8pt minimum — and avoid reverse type at small sizes. Fonts smaller than 8pt tend to fill in, especially on porous surfaces. White-on-black text (reverse type) is even riskier: the rubber between letters is thin, fragile, and prone to tearing or collecting ink. If you need reverse text, use it only at 14pt or larger.
3. Keep line weights above 0.5pt — ideally above 1pt. Extremely fine lines may look clean in Illustrator but they're physically fragile when engraved into rubber. They either tear away during production or collapse under slight stamp pressure. For any line that needs to hold its shape, 1pt is the safe minimum; 1.5pt is more reliable.
4. Check your negative space. Any enclosed area of your design — the counter of a letter "O", a circle inside a shape — needs to be large enough to stay open when the rubber is engraved and inked. If the enclosed space is smaller than about 1.5mm across, it will likely fill with ink and lose definition.
5. Design at actual stamp size. Don't design at 10× and scale down. A design that looks great large can have elements too small to engrave cleanly at actual production size. Work at the physical dimensions your stamp will be, and test it by printing the design on paper and physically holding the printout against your intended surface.
Standard stamp sizes to use as a starting point
- Book stamps / ex libris: 4.5 cm diameter (round) is the classic size
- Packaging / branding stamps: 5–7.5 cm wide suits most boxes and mailers
- Address stamps: 3–5 cm wide, 1.5–2 cm tall
- Wax seal stamps: 2.5–3.5 cm diameter
- General purpose: 2–3 inches (5–7.5 cm) wide works for most uses
When in doubt, go one size larger than you think you need. You can always apply a large stamp lightly; you can't make a small stamp readable if the text was already too small to engrave cleanly.
Step 4: Prepare Your File for Production
Your design is finalised. Now prepare it so a stamp maker can take it straight to engraving without back-and-forth corrections.
File format: vector first, raster second
The gold standard is a vector file — AI, EPS, SVG, or a vector-embedded PDF. Vector artwork is built from mathematical paths rather than pixels, which means it can be engraved at any size without losing quality. Most professional stamp makers prefer AI or EPS. SVG works well for online upload tools.
If you only have a raster file — a JPG, PNG, or TIFF — it must be at least 300 DPI at the final stamp dimensions. 600 DPI is better. A 72 DPI web graphic or a screenshot will produce a blurry, unusable impression. Many stamp makers offer a vector conversion service (often $10–20) if you can provide a clean, high-contrast raster file to work from.
Final file checklist
- All fonts outlined / converted to paths (so the maker doesn't need your specific fonts installed)
- Single-colour black — no CMYK, no RGB values other than pure black
- All strokes expanded (no hairline strokes that appear thick on screen but are actually 0pt)
- Design sized to actual stamp dimensions
- Background is white or transparent — not a coloured fill
- File saved as AI, EPS, SVG, or vector PDF
If you're designing for a wax seal stamp, the artwork requirements are slightly different: the design is engraved in reverse into a brass or zinc head, which means your maker will mirror it automatically. You don't need to flip anything; just supply the design as it should appear in the final impression.
Step 5: Order, Proof, and Test
Submitting your file is not the last step — the proof review is.
Most stamp makers will send a digital proof before going into production: a preview of how your artwork will look engraved. This is your last chance to catch problems before they're physically cut into rubber. Review it carefully:
- Is all text spelled correctly? Check letter by letter — especially names, URLs, and addresses.
- Are the proportions right? Does the design sit where you expected within the stamp border?
- Are any elements unexpectedly missing or simplified? If the maker removed something, ask why — it may be a production constraint you weren't aware of.
- Does the overall weight of the design look balanced? Not too much black, not too sparse?
Once you approve the proof and receive your stamp, do a few test impressions on scrap paper before using it on your actual project. Press straight down with even pressure — don't rock or slide the stamp. Let the ink dry completely before touching the impression.
If the result looks blurry, check whether the ink pad is overloaded (dab it on scrap paper first to remove excess). If certain fine elements didn't reproduce, you now know to make those elements bolder in any future revision. Most stamp designs improve over two or three iterations as you learn how your specific design translates to rubber.
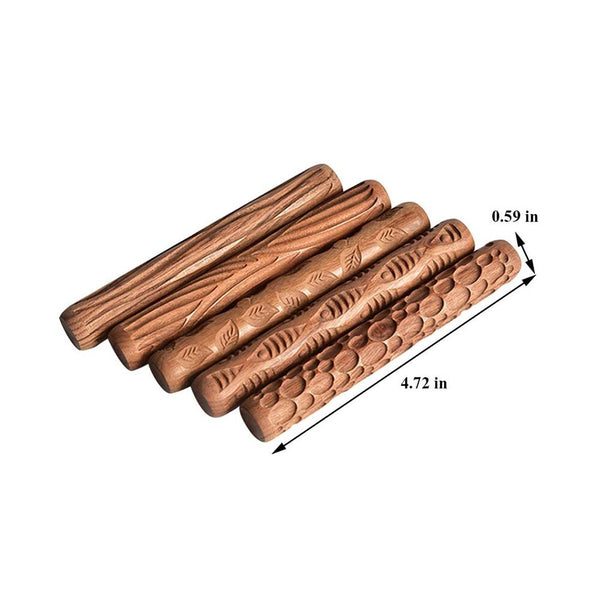
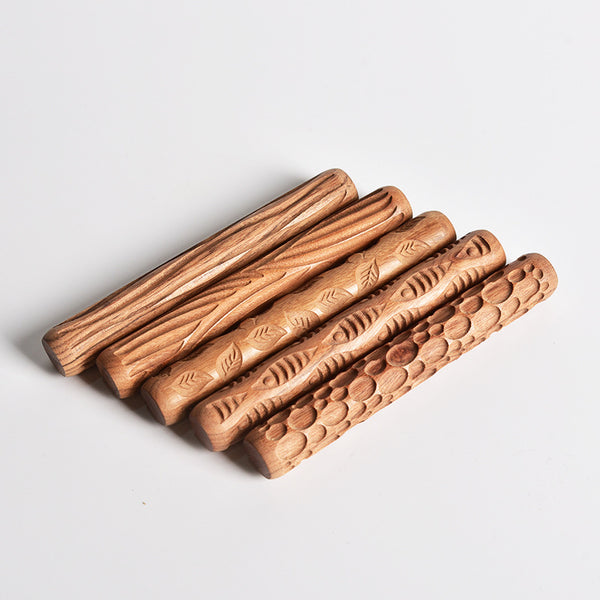
Ready to put your design into production? Browse Stampty's custom stamp collection to find the right stamp type for your project — from wood-handle rubber stamps and self-inking stamps to wax seal stamps and pottery tools.
The 5 Most Common Stamp Design Mistakes
1. Using a logo with gradients or drop shadows. These look fine digitally but become solid blobs when converted to a two-colour stamp. Strip all effects and work only with flat fills and strokes before submitting.
2. Fonts too small or too thin. Script and serif fonts with fine strokes are beautiful but fragile at small sizes. If your font has hairline strokes and you need it at 10pt or smaller, switch to a bolder weight or a different typeface altogether.
3. Submitting a low-resolution screen capture. A screenshot of your Canva design at 96 DPI will produce a visibly pixelated stamp. Always export from the source file at the highest possible resolution, or request a vector output.
4. Designing too large and scaling down without checking. A design that works perfectly at A4 size may have elements — thin rules, small text — that are completely unreadable at 5cm. Always proof your design printed at actual stamp dimensions before ordering.
5. Forgetting to outline fonts. If your design contains live text and you send the file without outlining the fonts, the maker's computer may not have your font installed and will substitute a different one. Always convert text to outlines (paths) before saving your final file.
Frequently Asked Questions
What file format should I use to design a custom stamp?
Vector formats — AI, EPS, SVG, or vector-based PDF — produce the sharpest results because they scale without losing quality. If you only have a raster image (JPG or PNG), make sure it's at least 300 DPI at the final stamp size. Most stamp makers can convert raster files to vector for a small fee.
What is the minimum font size for a custom stamp?
Most stamp makers recommend a minimum of 8pt font size for clean reproduction. Avoid bold fonts below 12pt, as ink can fill in the letter spacing and make text illegible. Stick to simple, non-decorative typefaces for small text.
Can I use my existing logo for a custom stamp?
Yes, but you'll likely need to simplify it first. Remove gradients, fine lines, and any details smaller than 1mm. Convert the file to pure black and white — no greys, no colour. If your logo is a raster file, request a vector version or use a vector conversion service before ordering.
What size should a custom stamp be?
For most uses, 2–3 inches (5–7.5 cm) wide covers packaging, branding, and general-purpose stamping well. Book stamps are typically 4.5 cm in diameter. Address stamps are usually 1–2 inches wide. The rule: if your design includes both text and imagery, always go one size larger than you think you need.
Why does my stamp design look blurry or smudged when printed?
The three most common causes are: the artwork file was low resolution; the design contained fine lines thinner than 0.5pt that collapsed during engraving; or too much ink was applied to the stamp pad. Start with a clean vector file, keep line weights above 1pt, and do a few test impressions on scrap paper before stamping your final product.