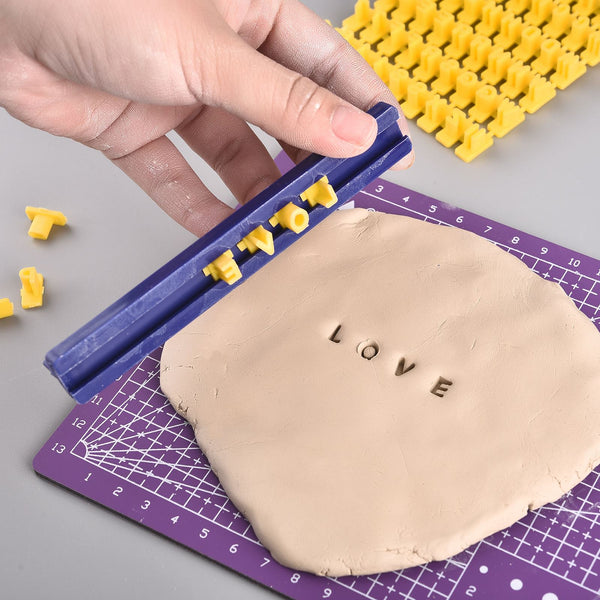
How to Prevent Pottery Stamps from Sticking to Clay?
You've invested in a beautiful custom pottery stamp, carefully designed your logo or motif — and then it happens: you press the stamp into the clay and when you lift it, the surface tears, the clay sticks, and the impression is ruined. If this sounds familiar, you're not alone. Sticking is the single most common frustration potters face when stamping clay, and it's almost always preventable.
In this guide, you'll learn exactly why pottery stamps stick, how to read your clay's moisture level, and five reliable techniques that professional potters use to get clean, crisp impressions every single time.
Why Do Pottery Stamps Stick to Clay?
Before you can fix the problem, it helps to understand what causes it. A pottery stamp sticks to clay for one of three reasons: the clay is too wet, the stamp has no release layer between it and the clay, or too much pressure is being applied — deforming the clay so that it wraps around the stamp's engraved details.
Clay in its plastic, freshly thrown state has a very high moisture content. When you press a stamp into wet clay, the moisture creates a suction bond between the two surfaces. The stamp's fine details — especially text, logos with thin lines, or intricate patterns — act like tiny anchors, holding the clay in place as you try to lift the stamp away. The result is torn edges, deformed impressions, or a chunk of clay that travels with your stamp.
The good news is that each of these causes has a straightforward solution. The five techniques below tackle the problem from different angles, and for most potters, using just two or three of them together eliminates sticking entirely.
Technique 1 — Wait for Leather-Hard Clay
The single most impactful change you can make is to time your stamping correctly. The leather-hard stage is the sweet spot for stamping: the clay has dried enough to hold its shape and accept fine detail, but still retains around 15% moisture — enough to accept a clean impression without cracking.
Leather-hard clay feels noticeably cool to the touch, but the surface is no longer tacky or sticky. Visually, it will have shifted from its initial shiny, wet appearance to a matte finish. If you press your fingernail lightly into the surface, it should leave a clean mark without the surrounding clay deforming or tearing.
If you press a stamp into clay that is still too wet, the impression will be deep but the edges will be messy and the stamp will stick. If the clay is too dry, the stamp will barely leave a visible mark, and the surface may crack. The leather-hard window is typically reached anywhere from several hours to three days after throwing or slab-building, depending on the clay body, thickness, and ambient humidity. Drying pieces upside down helps: the outside dries faster while the inside retains moisture, giving you that ideal gradient of firmer exterior over a softer interior — exactly what you need for clean impressions without wall deformation.
One practical tip: if you prefer to trim your wheel-thrown pieces first and then stamp, you may need to let the clay firm up a little more after trimming before stamping. Some potters trim at a softer stage, while others prefer drier clay. Adjust the sequence of your workflow to match the firmness your stamping requires.
Technique 2 — Apply a Release Agent
Even with perfectly timed leather-hard clay, a release agent provides an important extra layer of insurance — especially for stamps with fine details, deep undercuts, or complex custom designs. A release agent creates a thin barrier between the stamp surface and the clay that prevents molecular bonding.
The most popular options used by potters are:
- Cornstarch — the go-to choice for acrylic and rubber stamps. Use a soft, fluffy brush to apply an invisible, even layer directly onto the clay surface (not the stamp). Applied correctly, cornstarch doesn't need to be removed and won't interfere with glazing. Avoid heavy applications, which can leave a powdery residue.
- Vegetable oil — works particularly well with acrylic stamps like the laser-cut recycled acrylic used in Stampty's custom pottery stamps. Apply a very thin coat to the stamp surface with a cloth or your fingertip. Reapply every three to five impressions. A light coat is key — too much oil can blur fine details.
- Water misting — sometimes the simplest approach is the most effective. A light mist of water on the stamp or the clay surface reduces suction without introducing any foreign material. This works best when clay is at the drier end of the leather-hard spectrum.
- Baby powder / talc — functionally similar to cornstarch, and a traditional choice among ceramic artists. Apply lightly with a brush to the clay surface before stamping.
Avoid heavy oils or petroleum-based products directly on porous surfaces, as residue can interfere with glaze adhesion during firing. When in doubt, cornstarch and water are the safest, most glaze-friendly options.
Technique 3 — Chill Your Stamp Before Use
This technique comes from the polymer clay world but translates well to ceramic work: place your stamp in the refrigerator (not the freezer) for five to ten minutes before use. A cooler stamp surface reduces the tendency of clay to soften and stick against it during the brief moment of contact. The temperature differential also helps the stamp release cleanly as you lift it.
This approach is particularly helpful in warm studio environments where your hands transfer heat to the stamp during use. Acrylic and rubber stamps benefit most from chilling; metal stamps may already be cool enough on their own.
Be careful not to over-chill. A stamp that is too cold can cause the clay surface to contract slightly on contact, which may introduce micro-cracks in particularly thin pieces. A couple of minutes in the fridge — not the freezer — is all that's needed.
Technique 4 — Support the Clay from the Inside
One underappreciated reason for poor impressions and clay sticking is a lack of support behind the stamping surface. When you press a stamp into an unsupported wall or slab, the clay can flex, wrap around the stamp's relief, and grip it tightly. Supporting the reverse side allows you to apply adequate pressure for a crisp impression without the clay deforming around the stamp.
For slab work, place a flat board or foam pad beneath the slab before stamping. For wheel-thrown vessels, place the fingers of your non-stamping hand on the inside of the wall directly behind where the stamp will land. This provides counter-pressure that allows the stamp to sink evenly into the clay surface without the wall buckling. When stamping the base of a piece, simply pressing against the bat surface naturally provides this support.
For round-surface stamping — the side of a mug or a vase — invert the piece onto a soft fabric surface such as an old t-shirt. This supports the rim and allows the wall to deform slightly under pressure without cracking, while the stamp makes clean contact with the curved surface. Roll the stamp very gently from one side to the other along the curve rather than pressing straight down, which helps prevent air pockets and ensures full design contact.
Technique 5 — Master Your Angle and Pressure
Technique matters as much as preparation. Many potters inadvertently pull their stamp sideways as they lift it, dragging clay with them and causing the impression to smear or the clay to grip. A straight, perpendicular lift — directly away from the clay surface — is essential.
Press with even, firm pressure across the entire stamp face. For stamps with a handle (like Stampty's custom pottery stamps, which include a reclaimed wood handle), this is much easier because you can align your force directly through the stamp's center. Uneven pressure causes parts of the design to sink deeper than others, creating inconsistent impressions and increasing the risk of clay wrapping around high-relief areas.
A very slight rocking motion — gently pressing from one edge to the other before lifting — can help seat the stamp fully without using excessive downward force. Think of it as helping the stamp make complete contact rather than forcing it in. Once the stamp is fully seated, go straight up. Don't twist, don't drag — just lift cleanly and confidently.
For stamps with very fine details or small text, reduce the stamping pressure slightly and rely on a release agent to make up the difference. Thin lines and small letterforms are more prone to clay adhesion than bold, open designs, so slightly less pressure combined with a light cornstarch application is often the best combination.
Choosing the Right Custom Pottery Stamp for Sticking-Free Results
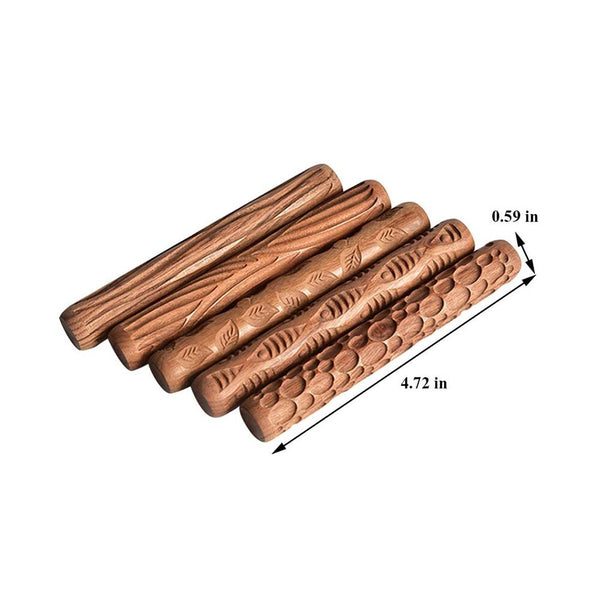
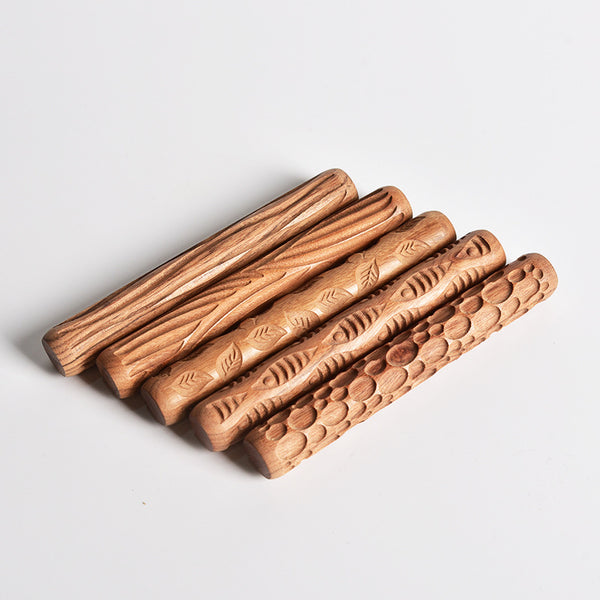
Stamp material plays a significant role in how likely a stamp is to stick. Bisque-fired clay stamps are naturally porous, which means they don't bond easily with damp clay — a classic solution that has been used for centuries. 3D-printed stamps can offer excellent detail but may need more frequent cleaning. Metal stamps (brass and aluminum) are durable and release cleanly with a light oil coating but can be expensive for complex custom designs.
Laser-cut acrylic stamps — like the custom pottery stamp from Stampty, made from recycled clear acrylic and reclaimed wood — sit in an excellent middle ground. The smooth, non-porous acrylic surface doesn't naturally bond to clay the way rougher materials can, and the precision laser cutting ensures sharp, accurate detail reproduction. With a light vegetable oil or cornstarch release, acrylic stamps perform reliably across slab work, flat surfaces, and with proper technique on curved forms as well.
For beginners, a simpler design with bold lines and generous spacing between elements is forgiving and releases cleanly with minimal technique. As you build experience with clay consistency and release timing, you can move confidently to more intricate logo designs or fine text stamps.
Cleaning Your Pottery Stamp After Use
Proper cleaning after each session keeps your stamp performing at its best and prevents built-up clay from blurring future impressions. Use a soft toothpick or a rubber-tipped clay shaper to gently work clay out of crevices — never a sharp metal tool, which can scratch the design surface. A soft-bristled brush with cool water removes remaining residue effectively.
Allow the stamp to dry completely before storing. Never soak a wood-handled stamp in water, and never put it in a dishwasher. Store it in a dry case or cloth-wrapped in a box, away from humidity. A well-cared-for stamp should produce consistent, sharp impressions for many years of studio use.
Frequently Asked Questions
Why does my pottery stamp stick to clay?
Pottery stamps stick to clay primarily because the clay is too wet or soft. When clay has excess moisture, it becomes tacky and grips the stamp's surface. Using a release agent and waiting until the clay reaches the leather-hard stage are the most effective solutions.
What is the best release agent for pottery stamps?
The most popular release agents for pottery stamps are cornstarch (applied with a soft brush), vegetable oil (sparingly applied), and water misting. Cornstarch is ideal for acrylic and rubber stamps; vegetable oil works well for metal and acrylic stamps. Each needs to be reapplied every few impressions.
At what clay stage should I use a pottery stamp?
The leather-hard stage is ideal for stamping. At this point, clay retains about 15% moisture — firm enough to hold detail without collapsing, but moist enough to accept a clean impression without cracking. The surface should feel cool to the touch but not sticky.
Can I use a custom pottery stamp on a wheel-thrown piece?
Yes, but it requires extra care. For wheel-thrown pieces, use a smaller custom pottery stamp with a simple design, apply at the leather-hard stage, support the inside of the wall with your fingers while pressing, and use a light circular motion to seat the stamp evenly into the curved surface.
How do I clean clay out of my pottery stamp?
Use a soft toothpick or rubber-tipped clay shaper to gently remove clay from crevices — never a sharp metal tool that can scratch the design. For residue, a soft brush with cool water works well. Allow the stamp to dry completely before storing. Do not soak stamps or put them in a dishwasher.